Project notes for a Unity 6 game: layout, conventions and checks the AI crew works to
The notes every Unity 6 game on GameCrew AI starts with and every crew member reads: where code, levels, tuning and assets live, the conventions to keep, and the checks a change must pass.
- crew
- agents
- prompt
- project
- notes
- layout
- conventions
- template
The notes file every Unity 6 game on GameCrew AI starts with. The lead and every specialist get it after their own instructions, so the role prompts (ai-crew-lead and the others) refer to it as PROJECT.md. A game's own copy changes as the game does.
<the game's title>: notes for AI agents
Unity 6000.6.8f1, URP 17.6 (Forward+), Input System, UI Toolkit HUD. The design is in README.md; keep it current as the game changes.
### Build, run, test
- In the CCGD studio, the agent runs these steps through its Unity tools (compile, scene, test, capture), which run Unity in a sandbox; tools/game.sh is for people working on the project locally.
- Close the Unity Editor on this project first. Batch mode refuses an open project.
tools/game.sh compilelists compile errors.tools/game.sh sceneruns setup and rebuildsAssets/Game/Scenes/Main.unity.tools/game.sh testruns EditMode and PlayMode tests.tools/game.sh playtest <name>runs PlayMode tests matching a name.tools/game.sh buildmakes the macOS player;tools/game.sh webglmakes the browser build inBuilds/webgl.- The browser build is also played on phones in portrait: keep the HUD readable at 390 px wide (anchor to corners, scale with the screen, nothing overlapping) and hide keyboard hints when
Input.touchSupported. - The browser build's page is
Assets/WebGLTemplates/CCGD: a start card listing the controls, and on phones a stick (W/A/S/D) and buttons that press the game's keys. Both come from the Controls table in README.md (an Action | Keys table under a "Controls" heading), so keep it current, and give every action a keyboard key (not only a mouse button) so phones can play it. The buttons sit in one cluster under the right thumb (about 200 px square; the stick takes the same bottom left): the first action after movement is the big one, at most five get a button, and each shows its action's first word, so order the table by how often an action is pressed. While a menu is up (the kit's pause or end screen) the page hides its stick and buttons. - A game can draw its own touch controls instead (a floating stick, a button layout made for it): add
public void SetTouch(string owner)toPageAudio. The studio sees it, and on a phone the page then hides its stick and buttons (keeping its pause button) and callsSetTouch("game")once the game starts; any other value hands the touches back. Until it's called, keep the game's own layout off, since the page's controls are showing. Keep the README's Controls table: the start card still lists it. - PlayMode tests run game time 3x faster than real time (
Assets/Game/Tests/test-clock.json; the studio'sTestClocksetsTime.timeScaleto 3 wherever the game would be at 1, and leaves a pause at 0 or a slow-motion alone). So in tests wait in game time (WaitForSeconds, or adding upTime.deltaTime), notWaitForSecondsRealtimeorrealtimeSinceStartup; check a pause withTime.timeScale == 0and "not paused" with> 0, never== 1; and in the game run timers and countdowns on scaled time unless they must ignore pauses. A test that really needs real time gets[Category("RealTime")]and runs at 1x. - Test just enough. PlayMode runs are the slowest step: compile, then one PlayMode run filtered to what you changed; after a failure, fix and rerun just the failing test (its name as the filter). No whole-suite run before a save: the studio's check runs EditMode whole and of PlayMode the smoke tests, its explorer and
SmokeTests(keep that class to a few quick tests that load the game and play its core for seconds). - What a PlayMode test costs is the pictures it draws: the studio's machine has no GPU, so every picture a test asks for (a camera's
Render(), a screenshot, a resized game view) is drawn in software, and in a large scene one costs seconds whatever its size (the frames of a batch test run between them are not drawn, and cost almost nothing). A test that only measures UI (layout, centring, text that fits) needs no 3D frame: switch the cameras off as soon as the scene has loaded (foreach (var c in Camera.allCameras) c.enabled = false;) and before resizing the game view, resize only when the size is what's being tested, and don't reload the scene for each check that could share one. Never leave a test that draws pictures, or a probe written to find something out, in the suite: delete a probe once it has answered. A test run's result lists its slowest tests with their seconds: look there before running a whole class again. - The studio stops a test run when one test runs over 4 minutes, or when no test starts or finishes for 3 minutes between tests; the tests that finished are reported and the rest are not run. A
[UnityTest]fails by itself after 3 minutes. A test that really needs longer says so with NUnit's[Timeout(milliseconds)]. - Every command prints the errors it found and exits non-zero if there were any. Compile, scene and tests must pass before you call a change done.
### Look at your work
tools/game.sh capture <dir> [filter]renders the scene from everyCaptureView, in edit mode, to PNGs. Capture the views your change shows (the filter), open them and look. A change to the level or its look isn't done until you've seen it. Where the whole pass is slow, a save retakes at most 10 views and keeps the earlier pictures of the others, marked "not retaken in this version".- Each view logs its render time, brightness and contrast (0-1). Under 0.06 brightness reads as black on most screens and under 0.05 contrast is a wall of fog; fix views flagged VERY DARK or LOW CONTRAST even in a night or storm game (moonlight, rim light, emissive accents, less fog near the camera). Around 0.10-0.15 can still read as night.
- Add a
Layout.Viewfor each new area or set piece so the capture shows it. - A PlayMode test saves what the game camera saw as it ended to
Captures/Tests/<test>.png(no HUD): every test where that picture is quick, and only the failed tests where it takes over 1.5 s (a large scene with no GPU; the studio measures it). When a test fails, open its frame: it often shows why (the player in a wall, off the level, the camera somewhere else).
### The generated scene (the big rule)
Scenes/Main.unityis generated byEditor/SceneBuilder.cs. Each build replaces it, so hand edits are lost.- Level placement lives in
Assets/Game/Resources/Level/level.json: every block, pickup, the spawn, the kill height, the views and the player's shape and jump. The map editor edits that file, so keep each entity'sidstable (notes refer to it). Read it throughLayout(orLevelData.Load()), never by parsing the file yourself. Rebuild withtools/game.sh sceneafter changing it. Assets/Game/Level/palette.jsondeclares every type the game places (block,pickup, ...), with its shape, size, props a designer would tweak (an enum's options, a number's range) andreachfor what the player must be able to get to. A new type needs its entry there and a builder case inSceneBuilder(until it has one, it shows as a magenta marker).EveryEntityAndPathTypeIsInThePaletteandEnumPropsHoldAnOptioncheck the file against the palette.- The procedural parts (terrain noise, decor scattering) stay in code, seeded from props so a designer can change the seed in the map editor.
level.playermust stay equal to the controller's numbers:PlayerController.jumpHeight, its speed and gravity, and the character controller's height, radius and step.PlayerNumbersMatchTheLevelFilechecks it, so change both together.- Materials are assets made in code (
ProjectSetup.Lit,ProjectSetup.Mat), so scene references survive rebuilds. - Every saved scene is checked: a renderer with no material or with a built-in-pipeline shader (Standard, Legacy Shaders, Particles/...) draws magenta under URP, so the scene step fails on it, as on a missing script or no camera. A
ParticleSystemadded in code has no material: give its renderer one with theUniversal Render Pipeline/Particles/Unlitshader.
### Where things are
Runtime/Core/:GameInput(all input;Simis the injection point for tests),CaptureView.Runtime/Player/,Runtime/Gameplay/,Runtime/World/(Layout),Runtime/UI/(Hud),Runtime/Diagnostics/(Playtest).Editor/:ProjectSetup(settings, URP, materials),SceneBuilder,Capture,BuildPlayer,Pipeline(the entry points the tools call).Editor/CCGD/is the studio's (model and texture import,GameModels, the scene check) and is replaced at every build.Craft/(project root): the studio's notes on look, light, motion, feel and the done gate, with values to start from. Read each at its moment (look and light before the first material or light, motion before the first moving character, feel once the loop plays, done before the final round). Replaced at every build.Tests/EditMode/checks the plan without a scene;Tests/PlayMode/loadsMainand drives the player throughGameInput.Sim.
### Conventions
- Namespace
<GameNamespace>for runtime code,<GameNamespace>.Editorfor editor code,<GameNamespace>.Testsfor tests. - One MonoBehaviour per file, named after its class. Enums and static helpers may share a file.
- Read input only through
GameInput; add new actions there, with aSimfield, so tests can drive them. - Log meaningful events with
Playtest.Log(type, detail); tests count them withPlaytest.Count. - Tunable numbers live in
Assets/Game/Resources/tuning.json(name, label, group, value, min, max): the 5-15 a designer would tweak (speeds, jump, gravity, enemy speed and counts, timers, camera distance). Read them withTuning.Value(name, fallback)where they're used, not once in Awake, so the creator's sliders beside the running game change them at once; the studio saves the creator's values as a version without a rebuild. Keep each range playable. - For Unity objects, use
!= null, not?.or??: Unity overloads==for destroyed objects and?.skips it. The?.inGameInputare on Input System devices, which are plain C# objects. - Static
Hudcalls are safe with no HUD present (tests rely on this). - Leaderboards: when the game has a score or run time, declare up to 3 boards in
game.json("scores": [{"id": "score", "label": "High score", "order": "high", "unit": "points"}],order"high"|"low", optionalunit"points"|"seconds",min,max) and callCCGD.Scores.Submit(value, board)once when a run ends (a no-op in the Editor and tests; the browser page asks for the player's name). - Play Mode (and every PlayMode test) enters without a domain reload, so static fields, static events and singletons keep their values from the previous play. Give every class with mutable static state a reset that runs at the start of each play:
[RuntimeInitializeOnLoadMethod(RuntimeInitializeLoadType.SubsystemRegistration)] static void ResetStatics() { ... }(set fields to their defaults, clear collections, null the instance, dropstatic eventhandlers). The starter'sGameInput,GameAudio,TuningandHudshow it. - A core mechanic gets one PlayMode test that plays it through
GameInput.Sim, and a bug that came back gets one; a tweak or a tuning change gets none. Level rules go in EditMode tests onLayout(the whole suite runs in seconds). - The studio adds its own PlayMode test, the explorer (
Assets/CCGD/Explorer): random input throughGameInput.Simfor three short runs of the first scene, failing on any exception or error the game logs. Fix what it names in the game's code.Assets/CCGD,Assets/Game/Editor/CCGD,Assets/WebGLTemplates/CCGDandCraft/are the studio's: read them, don't change them. - Build visuals from code: procedural meshes, URP Lit materials, lights, particles and post-processing. When imported art is added later, keep the procedural version as the fallback.
- A VR game (game.json
"vr": true): readAssets/CCGD/VR.mdfirst. The studio'sGameXRowns the session, the rig, the hands, locomotion and the HUD in the world; never add Unity's XR packages. - A multiplayer game (game.json
"multiplayer"): readAssets/CCGD/NET.mdfirst. The studio'sCCGD.GameNetowns room peers, 60 Hz interpolated avatars, host state, events andGameNet.Simfor tests; never add Netcode, Photon, Mirror or raw sockets.
### Sound
- Every sound in the game is generated by the studio: effects, ambience loops and music land in
Assets/Game/Resources/Audio/<name>.wav. Nothing is made in code: noAudioClip.Create,OnAudioFilterReador synthesizer (NoCodeInTheGameMakesSoundchecksRuntime/). Sound comes last: play cues by name while you build (a cue without a file is silent), and no sound is made until the game plays and its checks pass. A new game then gets a small set (thetheme, anambienceloop and the few cues that matter most); more are made with the studio's sound tools (sound_effect, music_cue) when the creator asks for them in a change. GameAudio.Play("jump")/PlayAt("pickup", pos)play the generated file of that name; a cue without one is silent (and logs it once), so name effects after the cues the code plays.GameAudio.Sound(name)loads a file (null if it isn't there). Play music and beds withGameAudio.Music(GameAudio.Sound("theme"))/Ambience(GameAudio.Sound("ambience")). Never move or rename these files: the studio keeps them in its asset list by that path.GameAudio.Register(cue, clip)swaps in any other generated clip without touching the code that plays it. Tests check feedback withGameAudio.Plays(cue), which counts a cue even when it's silent.- Changing music or ambience crossfades over
GameAudio.Crossfadeseconds (1.5), so switch tracks per area or moment freely;Music(null)fades out. - The browser page has a sound button that mutes the whole game through
PageAudio(the "CCGDPage" object): keep that component, and don't setAudioListener.volumeyourself (it's the mute). The page's buttons sit in the top-right corner (sound, and pause on phones): keep the HUD out of the top-right 140 x 80 px.
### Art and audio
- Reuse first: use assets this game already has, then the library (
library_search,library_use); generate only when nothing fits (saying why inreason), and never make a second version of something the game has unless the creator asked for a different one. - Generated textures are seamless 1024 px PNGs in
Assets/Game/Textures/<name>.png(made to tile: opposite edges match). Import with wrap mode Repeat and use them as a material's base map, tiled to the surface's size; keep a code-made material as the fallback. - Paid generation (images, 3D, sound) goes only through the studio's tools, which check the game's budget; never call a provider's API yourself.
- Staged art goes in
ArtSource/, outsideAssets/, and is imported by an editor step, never dropped half-downloaded intoAssets/. - 3D models: each model in
ArtSource/models/<name>/(from the studio's process_model or library_use) is imported by the scene step asAssets/Game/Models/<name>/<name>.prefab, with URP Lit materials from its texture maps: a LODGroup for a prop, or for a rigged character an Animator with one state per clip (idle, walk ...). Don't write your own importer and don't editAssets/Game/Models(the studio replaces it). InSceneBuilder,CCGD.Editor.GameModels.Place(name, parent, localPosition, yaw, height, collider)puts one in and returns null when the model isn't there: build the procedural version then. Models stand on their pivot at the height they were processed at;heightrescales,GameModels.Size(name)gives their size. - Characters: place the model as the visual child of the player or NPC object (which keeps its own collider and controller) and animate it with
GetComponentInChildren<Animator>().CrossFade("walk", 0.15f);GameModels.Clips(name)lists the states. Clips play in place, so the controller moves the character. The studio can look at and change a character's clips for free (animation_clips says which loop or travel, animation_sheet draws one as a contact sheet, edit_animation adds a trimmed, reversed, mirrored, in-place, faster or looped copy as a new Animator state); don't edit the FBX inArtSource/yourself.
Using it in your own assistant
This is reference material: the instructions GameCrew AI's own crew runs with on a Unity 6 game, as the studio's code has them today. Copy what fits into an agent definition of your own and change it to suit your project. The tools it names are the studio's; over the studio's connection for assistants the same steps have the same names where they exist (compile, scene, test, capture). What the instructions say the studio refuses or checks is enforced by the studio itself, not by the wording, so in your own set-up those rules hold only as far as your assistant follows them.
Where it comes from
- GameCrew AI: the project template each game starts from
Playable Unity 6 games made with GameCrew
Launch a real browser build using this engine and inspect its controls or fork its project tree.
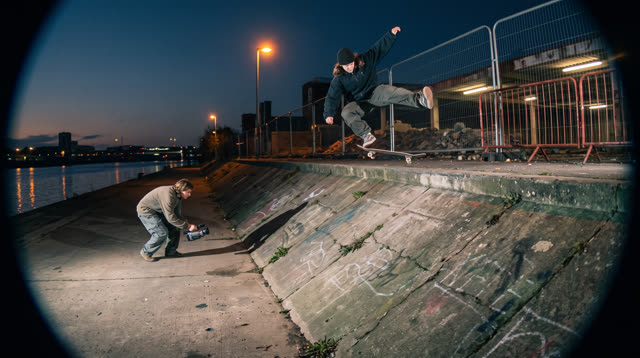
Kerbside
Every push, pop and scrape is earned: a grounded skateboarding game where your feet, not a button, do the trick, and a clean landing feels like the real thing.
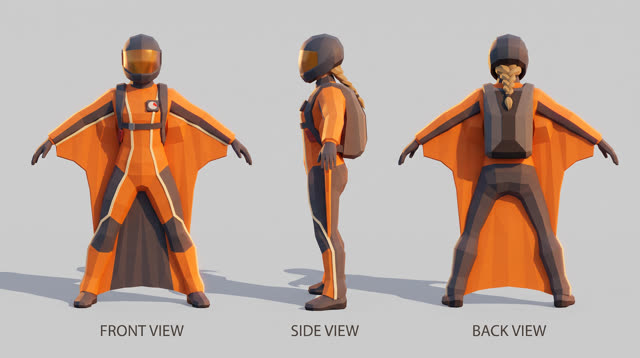
Fjordline
Leap from a granite wall under the midnight sun and carve one unbroken wingsuit line through Norway's most dramatic landscapes, from summit to sea, skimming close enough to touch the rock.
More of the AI crew on Unity 6
How the AI crew builds a Unity 6 game: the set-up and the lead's prompt →
GameCrew AI's own multi-agent set-up for Unity 6: one lead, 16 specialist roles, the task brief every hand-over opens with, how tasks run side by side on their own files, and the lead's full system prompt.
AI & encounter designer: the AI crew's Unity 6 role prompt →
The ai & encounter designer role on GameCrew AI's crew for Unity 6: Designs and builds enemy, companion, creature and NPC AI plus encounter pacing: readable telegraph-commit-recovery loops, context steering and patrol paths, squad attacker tokens, Design/ai.md, tuning knobs, and tests proving fair counterplay.
Animator: the AI crew's Unity 6 role prompt →
The animator role on GameCrew AI's crew for Unity 6: Fixes and tunes character and creature motion: clips, Animator setup, procedural animation code. Checks with anim_review (filmstrips + foot-slide/pop/clipping traces) and record_test. Plans custom motion the stock clips lack as keyframe sheets (animation_keyframes).
Asset artist: the AI crew's Unity 6 role prompt →
The asset artist role on GameCrew AI's crew for Unity 6: Makes the game's visual assets: concept art, 3D models (library first, then generated), process_model for Unity-ready LODs, textures for the big surfaces, rigging and clips for characters. Checks every turntable and tile. Spends from the game's asset budget.
Use verified techniques inside a real game
Describe your game idea for free or connect an MCP assistant to search and contribute techniques.